
Anterior crown work is where art and science meet, and where tiny details show up in selfies, wedding photos and everyday conversation. This guide walks from diagnosis and prep design through provisionalisation, impressions or scans, and lab communication with your lab team at NovaDent Labs so you can cut down remakes, control aesthetics and feel calm at the handover while giving us the information needed to create restorations that look natural, function well and hold up over time.
TL;DR:
- Start with smile goals, stump shade, and material selection before you touch a bur.
- Use depth grooves and a consistent margin design to give the lab space for ceramics and shade layering.
- Provisional crowns are your blueprint: get shape, length and emergence right before the lab starts.
- High quality photos, shade tabs and clear instructions help your lab match the adjacent incisors.
What is an anterior crown and when do you choose one?
Anterior dental crowns typically involve incisors and canines (#13 to 23 and their lower counterparts). Compared with posteriors, the stakes are higher: patients judge you on midline, incisal edge position, translucency and how well the restoration blends with gingiva and lip dynamics.
Key indications
- Large restorations or fractures where composite no longer feels predictable.
- Endodontically treated anterior teeth needing ferrule and coverage.
- Intrinsic discolouration (tetracycline, trauma) resistant to bleaching and veneers.
- Re-shaping peg laterals or correcting minor malalignment when orthodontics is not planned.
Situations where other options may be better
- Young patients with wide pulp horns where veneers or composite build ups conserve more teeth.
- Short clinical crowns without ferrule where crown lengthening or a different plan is wiser.
- Parafunction with severe wear where you may need a comprehensive occlusal scheme, not single unit crowns.
The Australian Dental Association and FDI World Dental Federation both emphasise case selection, ferrule and soft tissue health as foundations for long-term success with anterior ceramics.
Planning an anterior case: smile, stump and material
Good planning saves you from that sinking feeling of trying. Before you pick up a bur, decide what you want the final smile to look like and what your lab needs to get you there.
3S anterior crown planning: Smile, Stump, Shade
Before you start prepping, run through three quick checks: Smile (aesthetic goals and lip dynamics), Stump (remaining tooth structure and colour), and Shade (final shade family after any planned whitening). The 3S framework keeps your anterior planning focused and repeatable.
Aligning smile goals, stump shade and material choice before you prep improves anterior crown outcomes.
Smile design and patient expectations
A quick chat about photos on the patient’s phone can be gold. Ask what they like and dislike about their current smile. Agree on:
- Incisal edge position (phonetics, F and S sounds, resting display).
- Tooth proportions and midline relationship to the face.
- Shade family (how much whitening they plan before you match).
If you are planning multiple units or a more involved rehabilitation, consider a diagnostic wax up with your lab and a mock up in the mouth. The team at NovaDent Labs can design a diagnostic wax up digitally and provide the physical models you need for a chairside mock up.
Material selection for anterior crowns
Common options for anterior units include:
- Lithium disilicate (e.g. e.max type systems): excellent translucency and strength; great for single units where stump shade is acceptable.
- Layered zirconia: zirconia core for strength with layered porcelain for aesthetics; helpful for darker substrates.
- Monolithic translucent zirconia: higher strength, slightly less depth than layered options, suited to high risk occlusion or bruxism.
- Feldspathic porcelain on refractory dies: very lifelike but technique sensitive and generally thinner indications.
Material choice shapes your reduction depths. If you are unsure, call the lab or note the options on your prescription; at NovaDent we routinely help dentists match material to stump shade, occlusion and patient expectations on implants and natural teeth. You can also review our anterior crown materials overview and our zirconia crowns overview for indications and prep recommendations.
Systematic reviews report 5 to 10 year survival rates around 95 to 97% for well prepared lithium disilicate single crowns, including many anterior cases, when bonding and occlusion are carefully controlled; see this anterior crown survival review for detailed data.
Shade selection and photography
For anterior crowns, a basic A2 on the lab sheet rarely ends well. Take:
- At least one photo with the shade tab held in the same plane as the tooth.
- Close up of the tooth hydrated and another after drying for 5 seconds.
- Full smile photo at rest and in a broad smile.
A quick reference to the Australian Dental Association photography recommendations helps standardise your lighting and angles across cases.
Step by step anterior crown prep
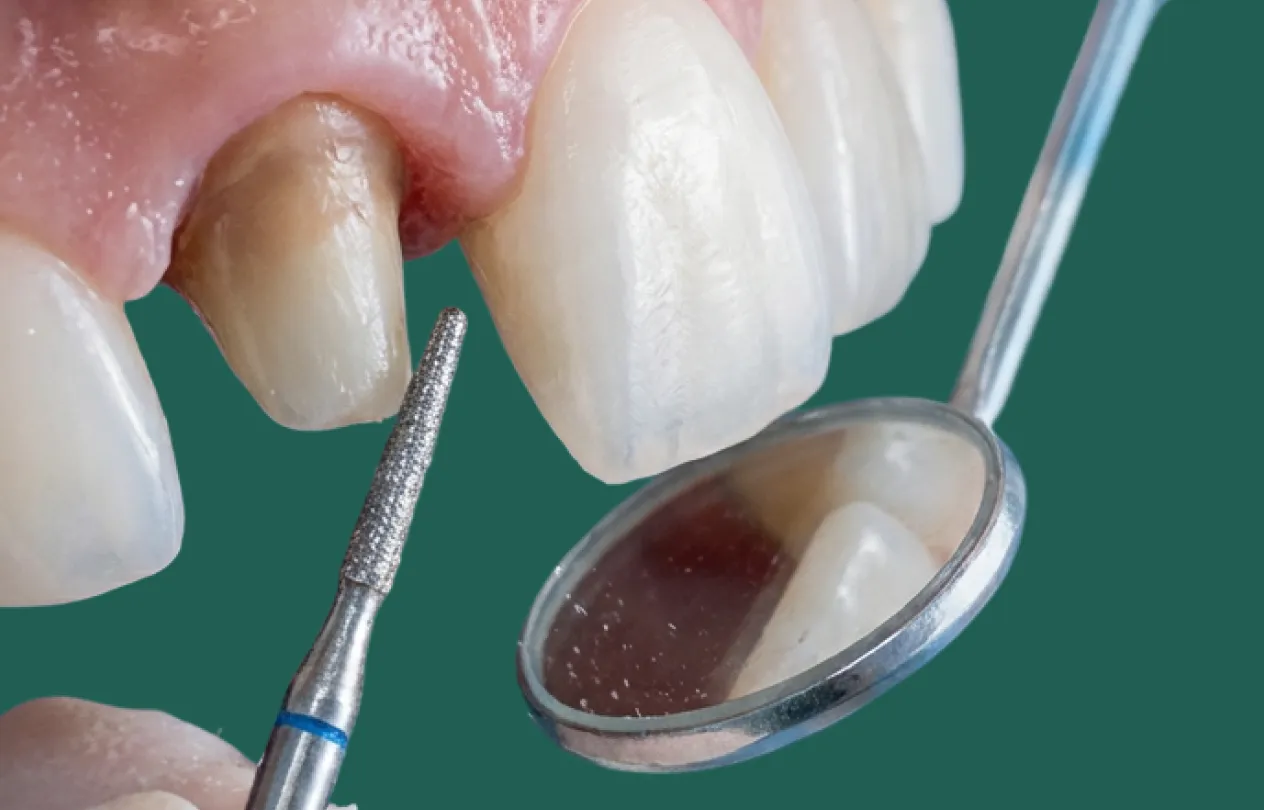
Every clinician has a slightly different hand skill, but a structured sequence keeps your margins clear and reduces even. Here’s a simple pattern you can stick to for most central and lateral incisors.
A consistent anterior crown preparation workflow helps you achieve even reduction and clear margins.
1. Isolation, assessment and depth grooves
- Use a rubber dam or at least a well placed retraction cord and high volume suction.
- Mark existing incisal edges and midline with a pencil on the tooth and on your provisional or mock up.
- Place depth grooves labially, interproximally and incisally according to material (see table below).
2. Incisal reduction
Aim for a flat, slightly palatally inclined platform so the technician can build natural translucency and incisal halo. Typically you will reduce:
3. Axial reduction and margin design
Connect your depth grooves with long, sweeping strokes. Keep:
- A uniform margin all the way around (no mix of shoulder one side and feather edge the other).
- Supragingival margins wherever aesthetics allow, especially on palatal surfaces.
- Rounded line angles to reduce stress in ceramics.
Remember the ferrule: you want at least 1.5 to 2 mm of sound tooth above the finish line circumferentially, particularly after endodontic treatment.
4. Finishing and soft tissue management
Refine the prep with fine grit diamonds and polishing discs. Then:
- Pack a retraction cord (or double cord) gently into the sulcus.
- Control crevicular fluid with haemostatic agents as needed.
- Check under magnification for ledges, unsupported enamel and undercuts.
High quality photos of the prep from multiple angles can be uploaded with your digital case files via our secure online case submission form.
Impression or scan: giving the lab accurate data
Whether you work analogue, digital or a mix, the principle is the same: the lab needs clear margins, stable occlusal records and a sense of the smile in motion.
Accurate anterior impressions or scans give the lab the data they need to design predictable crowns.
Conventional impressions for anterior crowns
- Use high quality PVS or polyether and a rigid tray to limit distortion.
- Check that margins are visible all the way around before dismissing the patient.
- Take an opposing impression and a bite registration that captures incisal guidance.
Digital impressions and IOS tips
For intraoral scanners:
- Scan before and after prep so the lab can reference the original tooth shape.
- Run an extra pass along the cervical area after retraction to show finish lines.
- Upload HD photos through your scanner portal or send directly to the lab with the STL/PLY files.
NovaDent Labs accepts files from major scanners and designs crowns within a CAD/CAM workflow compatible with ISO 13485 and TGA requirements. If you are transitioning from analogue to digital, our team can walk you through a hybrid workflow where you scan some cases and still send conventional impressions for others. For scanner setup and sending cases digitally, see our scanner connection guide.
For more on digital workflows and ceramic performance, a quick search on PubMed shows strong long term data when preparation and bonding are done properly.
Provisional crowns and try in tips
Think of the provisional crown as a low risk prototype. If the patient loves the provisional, your lab has a clear target.
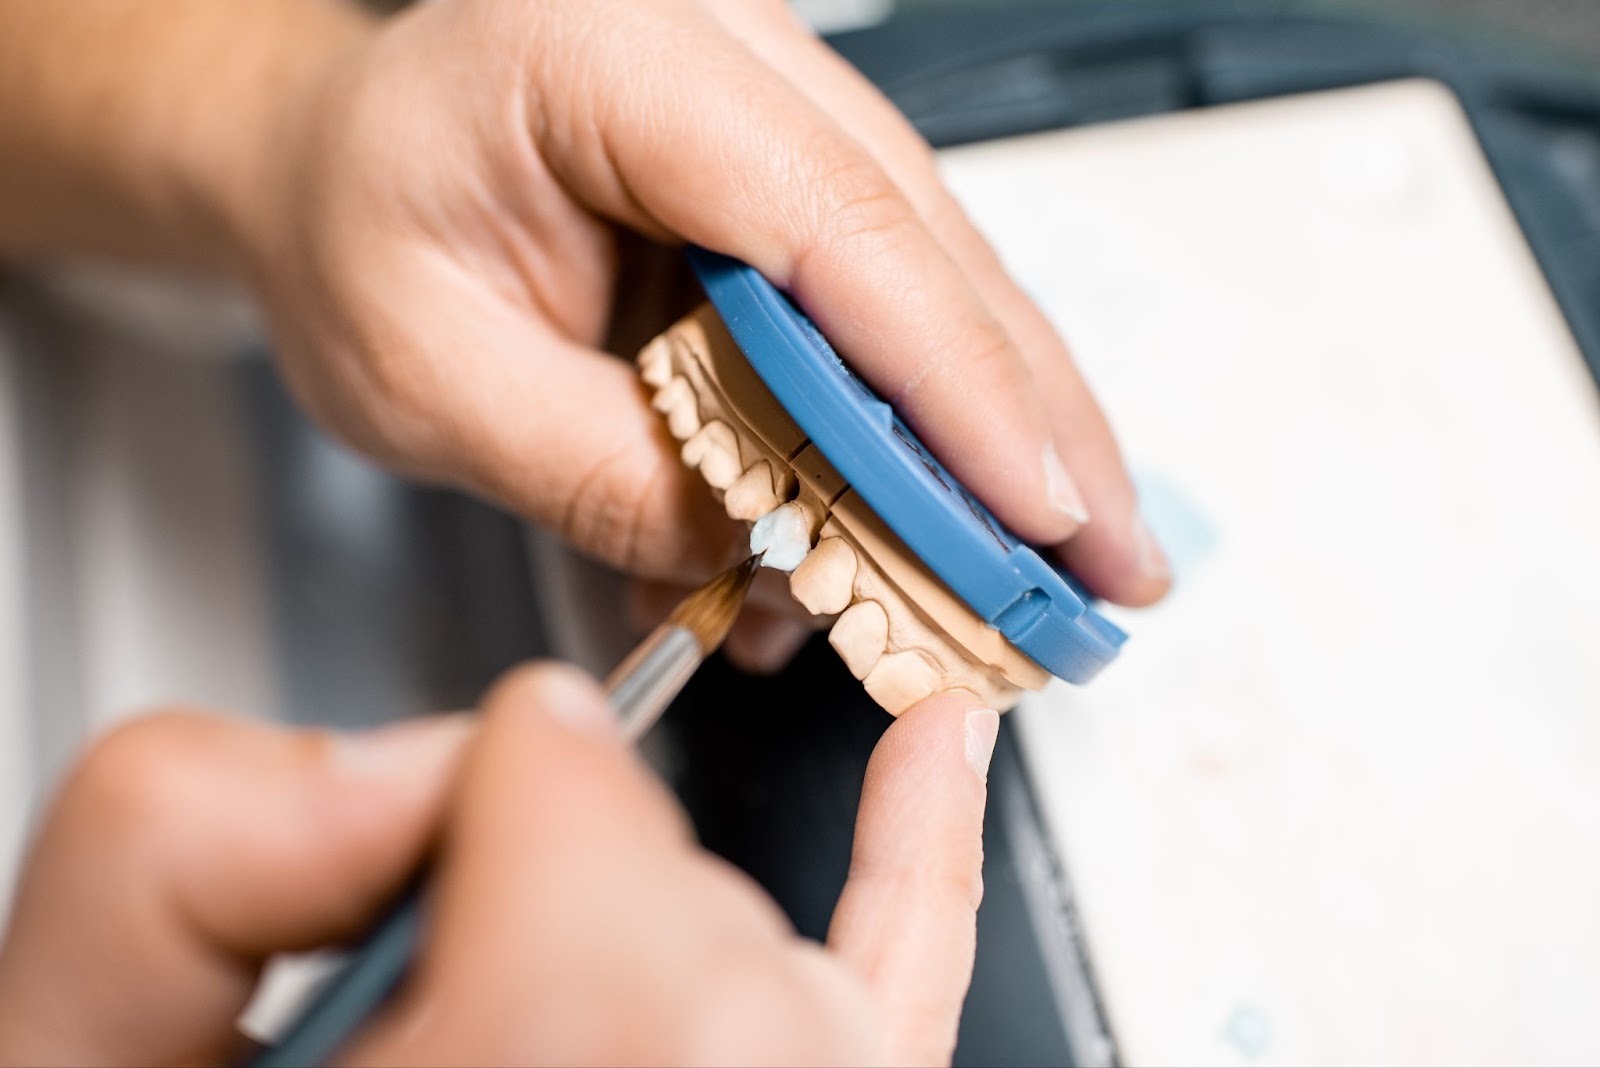
Making provisionals that guide the lab
- Base the provisional on a diagnostic wax up or digital design whenever possible.
- Fine tune length, contour and emergence profile until lips and gingiva look balanced.
- Record the final provisional with photos from multiple angles and, if needed, a light body impression or scan.
Note on your lab sheet: “Copy provisional” and specify any planned changes (e.g. +0.5 mm length on #11). At NovaDent, our technicians use your provisional photos, scans and records to guide emergence profile and shape on complex anterior and implant supported cases.
Try-in: checking fit, shade and characterisation
- Start with fit and margins, then contacts and occlusion, and only then shade.
- Use try in pastes that mirror your final cement’s value.
- Check the crown in natural light as well as operational lighting when possible.
If something feels slightly off, snap a quick photo and call the lab while the patient is still in the chair. Small adjustments in surface texture or incisal translucency can often be made with a short return to the lab rather than a full remake.
Common anterior problems and how to handle them
Even with good planning, a few issues show up again and again. Here are practical ways to handle them.
Dark stump shades
When the underlying tooth is discoloured:
- Record the stump shade using a dedicated stump shade guide.
- Consider a more opaque core (e.g. zirconia) with layered ceramics.
- Discuss whether a slightly higher value on the crown will help or hurt the overall smile harmony.
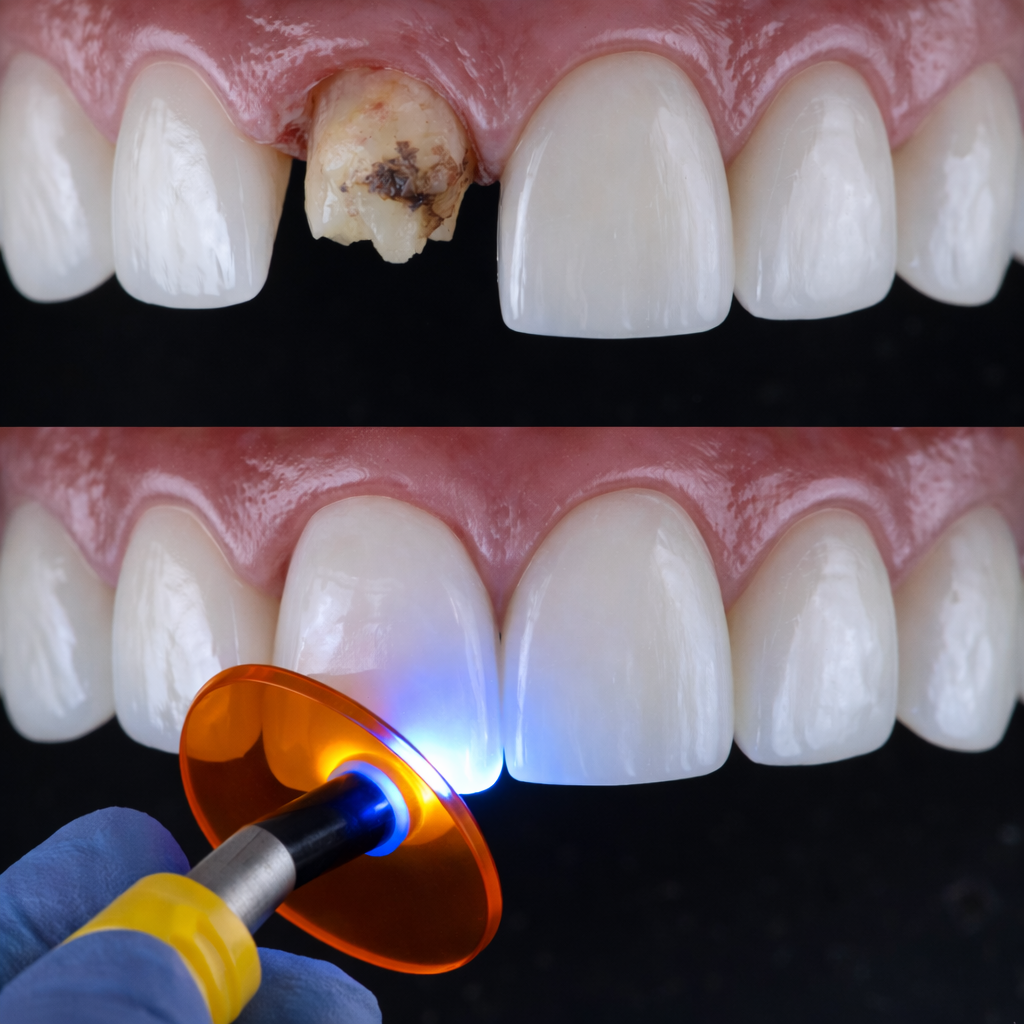
Case vignette: single central redo
For example, consider a 34 year old patient who presents with an old PFM crown on the upper left central incisor (#21), showing a grey cervical margin and a dark A4 stump after endodontic treatment. The patient wanted a brighter smile (target shade A1) without orthodontics or whitening.
The plan was a single anterior crown with approximately 1.8 mm incisal reduction, 1.2 mm labial reduction and a 1.0 mm palatal chamfer, maintaining at least 2 mm of ferrule. Working with NovaDent Labs, the case was completed using a layered zirconia coping to mask the stump and a neutral value resin cement. Turnaround fit within our usual 5 to 9 business day window with only minor occlusal adjustments at fit.
Details are adapted from typical anterior cases to illustrate the planning and lab communication process, not a specific patient guarantee.
Black triangles and emergence profile
Open gingival embrasures can age the smile quickly. Provisional crowns are your best test bed for soft tissue response. If papillae are blunted or history of periodontal disease exists, include photos and a note to the lab about desired emergence so they can shape contacts accordingly.
Post-op sensitivity and occlusal problems
- Check for high spots in protrusive and lateral excursions, not just MIP.
- Review coolant and remaining dentine thickness in your prep; in some cases, a desensitising regimen or delayed bonding helps.
- Discuss occlusal guard options with heavy bruxers.
When you see patterns across several patients for example, repeated adjustments on palatal contacts share that feedback with your lab so they can build it into their design protocol.
Working with NovaDent Labs on anterior cases
NovaDent Labs partners with general dentists and dental specialists across Australia, from single unit centrals to full arch implant cases.
What to send for predictable anterior results
- Clear lab sheet with material preferences and any non negotiables (no metal display, no midline shift, etc.).
- Pre-op, prep, stump shade, provisional and full smile photos.
- Accurate impressions or IOS files plus a bite that records guidance.
How NovaDent supports your workflow
- Digital CAD/CAM design tools to model anatomy and symmetry.
- Turnaround typically 5 to 9 business days across Australia.
- Case planning calls for complex aesthetic work and anterior implants.
If you would like to standardise your anterior and posterior crown workflows with a single lab partner, you can request a price list and speak with our team about materials, other dental crown costs, indications and sample cases.
Chairside anterior crown prep checklist
Keep this checklist next to your unit for the next few weeks and notice how much smoother your anterior cases feel:
- Have I agreed on smile goals, shade and incisal edge position with the patient?
- Did I choose material based on stump shade, space and occlusion?
- Are my reductions even and within the ranges my lab recommends?
- Is the margin continuous, clean and visible 360 degrees?
- Have I captured high quality photos and a stump shade?
- Does the provisional crown match the intended final length, contour and emergence?
- Did I send all necessary data and instructions to the lab?
When those boxes are ticked consistently, chairside adjustments shrink, remakes drop, and you gain the quiet confidence that comes from a reliable protocol and a lab team that knows your preferences.
Related Posts
You may also be interested in

TMJ Splint vs Night Guard: What’s the Difference?
How to Clean a Mouth Guard Properly Without Damaging It
Multi Unit Abutment Explained: Purpose, Benefits & Applications

NovaDent Has Arrived.
Previously VTS Dental Labs.
Same team
Same standards
New identity
Visit our new website