
If you have ever prepped a “simple” crown that turned into three visits of remakes and occlusal tweaks, you already know why many practices are looking closely at cad cam dentistry. Rather than wrestling with distorted impressions or fractured provisionals, digital workflows give you a consistent way to move from scan to final restoration with fewer surprises.
This guide unpacks what CAD/CAM actually means in day to day clinical terms, how it has evolved, and where it fits best in your treatment planning. We will look at chairside and lab based options, common materials, and the practical steps that help you get predictable fits when you partner with a digital lab like NovaDent Labs in Sydney.
TL;DR
- CAD/CAM is a digital Scan–Design–Make–Fit workflow (scan → design → manufacture → fit) for restorations such as crowns, onlays, veneers, bridges, and implant components.
- Research shows modern CAD/CAM crowns have clinically acceptable marginal fit and long‑term survival comparable to conventional techniques when fundamentals like preparation and scanning are done well.
- You can produce restorations chairside, via a lab, or a hybrid approach, depending on case complexity, capital budget, and team skill.
- A reliable CAD/CAM lab partner helps you standardise preps, scanning protocols, and materials so your appointments run on time.
NovaDent Labs provides digital dental workflows and CAD/CAM manufactured restorations for dental practices across Australia.
View Our Services →
Learn About Intraoral Scanners →
Submit a Case →
What is CAD/CAM dentistry?
At its core, CAD/CAM dentistry uses computer aided design (CAD) and computer aided manufacturing (CAM) to design and fabricate indirect restorations. Instead of a physical impression and wax up, you work from a digital model generated by an intraoral scanner or lab scanner, then design restorations in software and manufacture them by milling or 3D printing, as outlined in standard overviews of CAD/CAM dentistry.
In practical terms, that means:
- Digital data capture – intraoral scan or model scan, usually exported as STL or PLY.
- CAD stage – the restoration is designed virtually, with control over morphology, contacts, and occlusion.
- CAM stage – a mill or printer fabricates the restoration from ceramics, hybrid ceramics, zirconia, or resin blocks/discs.
For the clinician, cad cam dental workflows can reduce remakes, shorten adjustment time, and give patients a more visual way to understand their treatment.
A short history of CAD/CAM in dentistry
CAD/CAM dentistry has evolved from early optical impression experiments in the 1970s to today’s routine use of digital scanners, design software, and mills for single crowns, inlays, onlays, short‑span bridges, implant abutments, splints, and even full‑arch cases. Historical overview of CAD/CAM in dentistry
How dental CAD CAM workflows look in practice: the Scan–Design–Make–Fit framework
In day to day clinical work, dental cad cam workflows usually follow four steps that we summarise as the Scan–Design–Make–Fit framework.
1. Scan – data capture
You capture the preparation, opposing arch, and bite with an intraoral scanner, or send a high quality impression to the lab for model scanning. Consistent retraction, moisture control, and clear margins remain non-negotiable. A short “scan checklist” posted in your surgery can help the whole team stay consistent; NovaDent provides one with our scanner connection guide, which you can also bookmark for chairside reference.
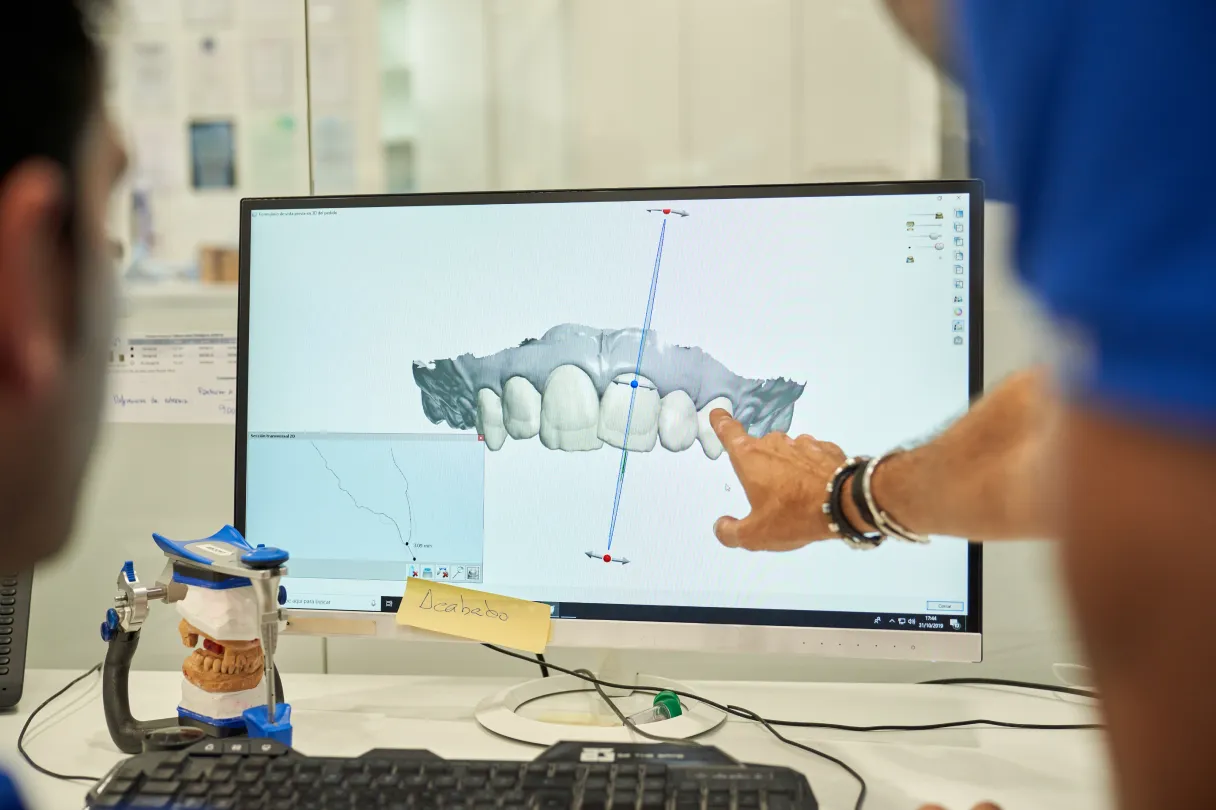
2. Design (CAD)
In the CAD stage, the restoration is designed virtually. Contact points, occlusal schemes, emergence profiles, and connector dimensions are set according to material guidelines and the patient’s functional needs. Many labs use AI‑assisted design to get a fast, anatomic starting point that is then refined by a technician.
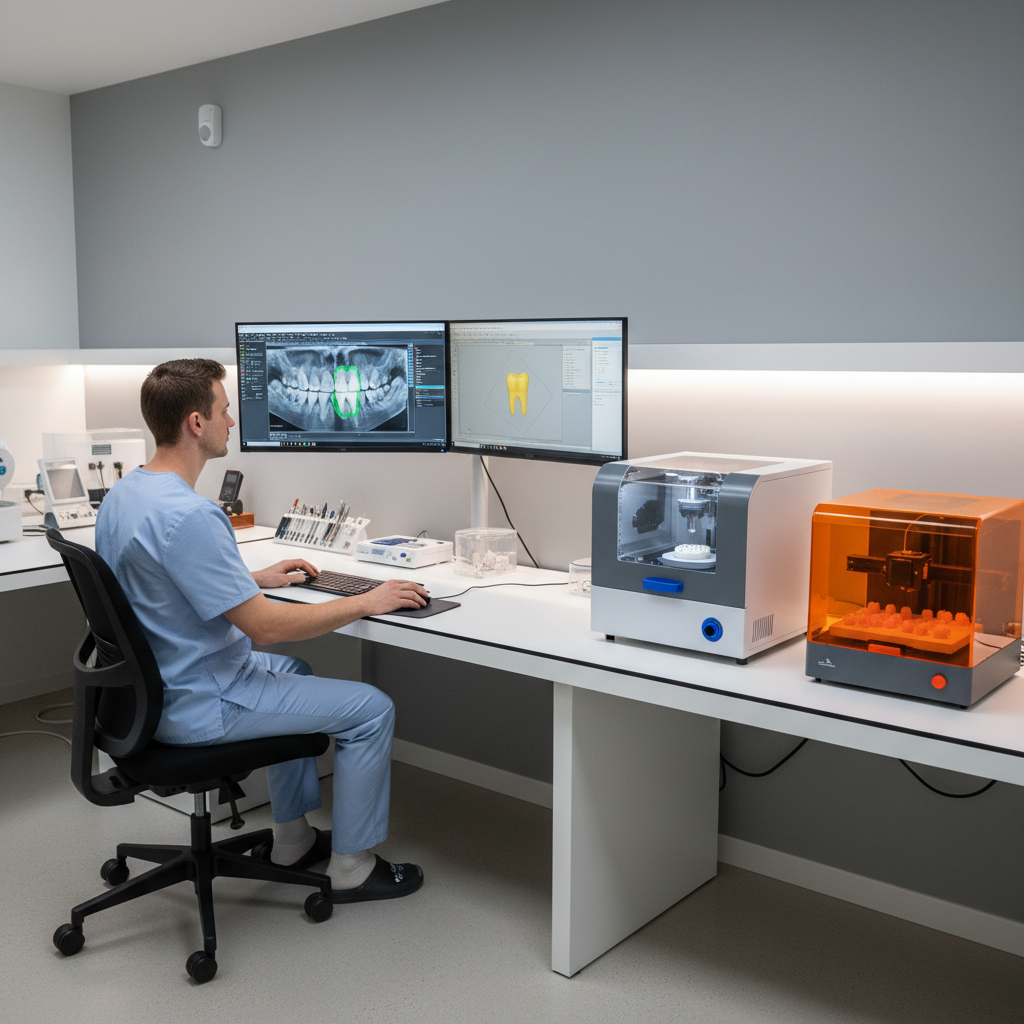
3. Make – manufacture (CAM)
The design is manufactured via subtractive milling or, increasingly, additive 3D printing. Research comparing milled and 3D‑printed crowns continues to grow, with both approaches showing clinically acceptable accuracy when workflows are well controlled, according to in vitro comparisons of milled and printed crown materials. Study on milled versus 3D‑printed crown accuracy
4. Fit – finishing, characterisation, and delivery
After milling or printing, restorations may be sintered, glazed, stained, or polished to final contour before try in and cementation. In a lab based workflow, this is where experienced technicians add subtle anatomy and surface texture that is hard to reproduce chairside at scale, helping the restoration fit smoothly at the insert appointment.
Chairside vs lab based CAD/CAM: which suits your practice?
One of the most common questions about CAD/CAM dental workflows is whether to invest in a full chairside system or lean on a digital lab.
Chairside systems
- Pros: Same day units for selected cases, strong patient “wow” factor, control over design while the patient is in the chair.
- Limitations: High capital outlay, ongoing software and hardware updates, steep learning curve for the whole team, and potential impact on chair time if cases run long.
Lab based CAD/CAM
- Pros: Access to a wider range of materials and multi axis mills, technician expertise for complex morphology and aesthetics, and no need to maintain in house milling equipment.
- Limitations: Two visit workflow in most cases, reliance on courier/post, and the usual need for clear prescriptions and photos.
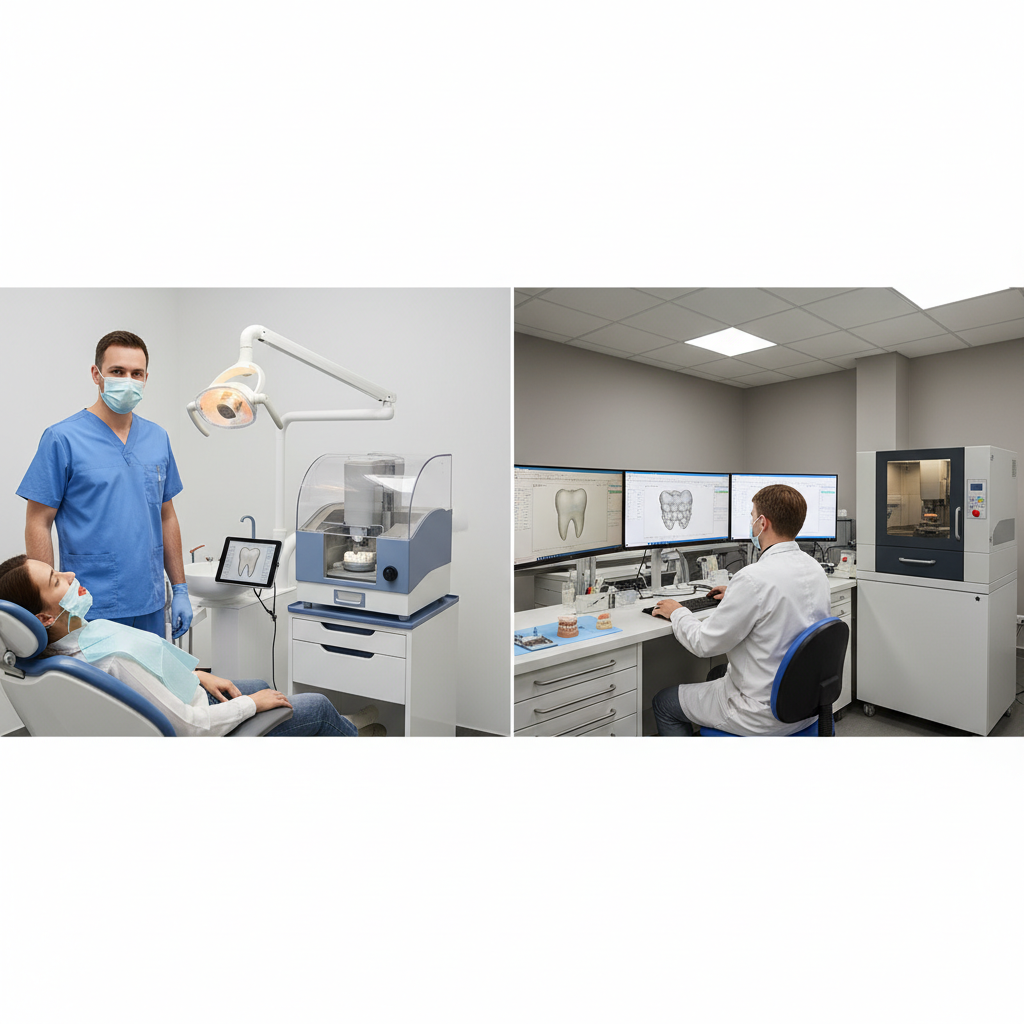
Contrasting chairside CAD/CAM in the clinic with lab based CAD/CAM support.Chairside vs lab based CAD/CAM at a glance
Many Australian practices now use a hybrid model: they scan in house, then send files directly to a digital lab such as NovaDent for CAD/CAM production. This keeps appointments efficient while avoiding the cost and maintenance of in‑house mills.
Which cases suit CAD/CAM dental restorations?
CAD/CAM is highly adaptable. Typical indications include:
- Single posterior and anterior crowns (lithium disilicate, zirconia, hybrid ceramics).
- Inlays, onlays, and overlays in ceramics or high strength composites.
- Short span fixed partial dentures within material guidelines.
- Custom implant abutments and screw retained crowns.
- Occlusal splints and some orthodontic/surgical guides.
Common CAD/CAM materials and typical indications
From an evidence perspective, systematic reviews of CAD/CAM all‑ceramic crowns report mean marginal discrepancies of around 55µm within the 50–120µm range generally considered clinically acceptable and pooled survival rates above 80% over 10–15 years.
For full arch rehabilitations, highly aesthetic anterior work, or cases with compromised occlusion, a lab based CAD/CAM approach with detailed photos and bite records is usually safer than a purely chairside workflow. You can view NovaDent’s crown and bridge options and implant restoration services for examples of how these indications translate into lab prescriptions.
Implementing CAD/CAM in a modern dental practice
Adopting CAD/CAM usually works best as a gradual transition: keep what already works, then layer digital steps onto your existing restorative systems. You can use a simple digital dentistry lab partner checklist to decide which steps to standardise with your lab.
Key practical steps
- Set clear prep guidelines – agree with your lab on margin design, minimum reduction, and go‑to materials for typical cases.
- Standardise scanning protocols – decide who scans, in what sequence, and how images are checked before the patient leaves.
- Use structured digital prescriptions – include material, shade, stump shade, occlusal scheme, and photos as standard fields.
- Train the team – assistants who understand how CAD/CAM works can catch small errors (like a missed margin) before files leave the practice.
Common pitfalls when introducing cad cam dentistry
- Under preparation of occlusal or axial surfaces for the chosen material.
- Indistinct or deeply subgingival margins without adequate retraction.
- Scanning before haemostasis or without full arch and bite capture.
- Jumping straight into complex full arch or high aesthetic cases before the team is confident with routine single units.
- Skipping case debriefs with your lab and not refining prep and scan protocols based on early results.
Keeping these points in mind will help you build confidence in cad cam dentistry while keeping remakes and chairside adjustments low.
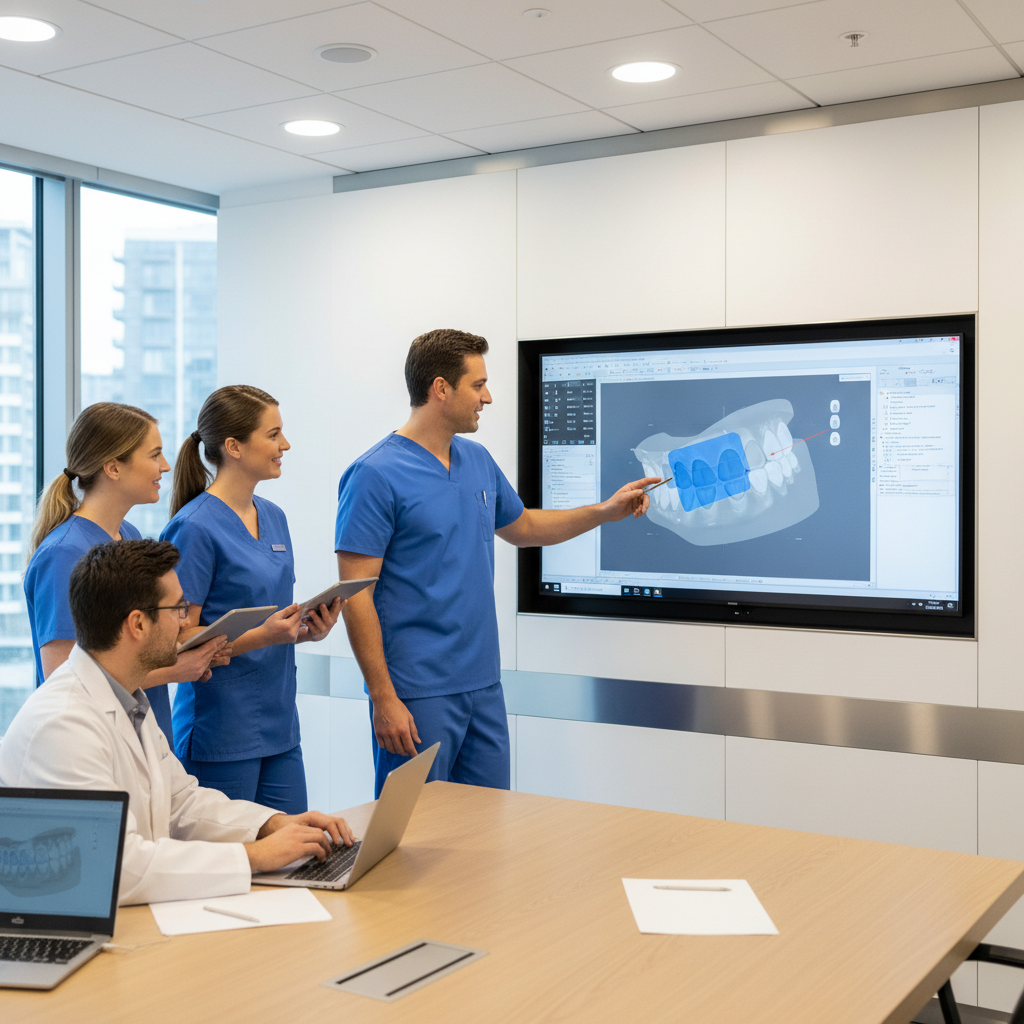
Working with a CAD/CAM dental lab partner
NovaDent Labs is a CAD/CAM focused dental lab in Sydney, also has footprints across Melbourne, Brisbane and Adelaide supporting digital workflows for crowns, bridges, dentures, and implant restorations for practices across Australia.
When you send digital cases to NovaDent, you benefit from:
- Compatibility with leading intraoral scanners, file formats, and major implant systems.
- ISO 13485 and TGA aligned processes for documented quality control.
- Typical 5–9 business day turnaround across Australia.
- Case planning support, including material selection, prep feedback, and Scan–Design–Make–Fit workflow advice when requested.
NovaDent Labs provides digital dental workflows and CAD/CAM manufactured restorations for dental practices across Australia.
View Our Services →
Learn About Intraoral Scanners →
Submit a Case →
If you are ready to make CAD/CAM a standard part of your restorative workflow, you can request a current price list or speak with our team about how to integrate scanning and lab protocols into your existing systems.
FAQs
Is CAD/CAM as accurate as conventional crowns?
Systematic reviews generally report that CAD/CAM all ceramic crowns achieve marginal fits within clinically acceptable ranges and long‑term survival rates that are at least comparable to conventional techniques when preparation and scanning are done well. Outcomes still depend on case selection, prep design, occlusion, and patient factors.
Does CAD/CAM reduce chairside time?
With an efficient digital impression and a lab that understands your preferences, many clinicians see shorter insert appointments and fewer remakes. Chairside only workflows can extend single visits but may reduce the need for temporisation and a second appointment in selected cases.
Is CAD/CAM suitable for every patient?
No single workflow suits every case. Subgingival margins, poor isolation, parafunction, and complex aesthetic demands may call for modified designs, additional records, or alternative approaches. The best results come from matching indications and materials to the individual patient and working closely with your lab.
Where can I learn more about CAD/CAM dentistry?
For a broad overview, see the CAD/CAM dentistry article on Wikipedia and review recent systematic reviews comparing CAD/CAM and conventional crowns in journals indexed on PubMed and other databases. NovaDent can also share case examples and practical tips during one on one lab consultations, and you can explore our dental blogs for more digital dentistry case studies and workflow tips.
Related Posts
You may also be interested in

TMJ Splint vs Night Guard: What’s the Difference?
How to Clean a Mouth Guard Properly Without Damaging It
Multi Unit Abutment Explained: Purpose, Benefits & Applications

NovaDent Has Arrived.
Previously VTS Dental Labs.
Same team
Same standards
New identity
Visit our new website